How to deploy a mobile VR application to the Meta Quest 3S
- 28 Nov 2024Setup
- CPU: Intel Core i5-13600KF
- GPU: Inno3D GeForce RTX 4070 TWIN X2
- RAM: 64 GB
- OS: Windows 10 Pro 22H2
- UE: 5.4
- HMD: Meta Quest 3S
Summary
This tutorial explains how to deploy a mobile VR application to the Meta Quest 3S. We will use the VRTemplate as the application to be deployed. By the end of the tutorial, you will be able to run the VRTemplate as a mobile application on the Meta Quest 3S. If you have any questions, feel free to email us.
Set Up Android SDK and NDK
The Meta Quest 3S is an Android-based standalone headset, so the Unreal Engine will need to be configured for Android development. To set up the Android SDK and NDK in UE 5.4 follow the next steps:
- Open the Epic Games Launcher and go to Unreal Engine > Library.
- Click on the arrow next to the Launch button, select Options > Target Platforms > Android and click Apply.
- Install Android Studio and the necessary SDK components. Follow Unreal Engine’s documentation for this.
Install the Meta XR Plugin
Follow the steps under the The Meta XR plugin and UE 5.x section.
Configure the headset for app development
Follow the steps on the Configuring your headset for app development webpage.
Configure the Unreal project
- Follow the steps on the Setting up the Meta XR plugin for your project webpage.
- The final section is called Configure the Meta XR Platform window. This part can be skipped since it is dealing with uploading your Unreal Engine apps for Quest devices to the Meta Horizon platform. We will upload our apps directly to the headset. Therefore, this is not needed.
- An overview of the Meta XR plugin settings can be found here. For now everything can be left at their default setting.
- Go to Project Settings > Platforms > Android and enable Package game data inside .apk?.
Launch the app on a Meta Quest headset
- Package your app by going to Platforms > Android > Package Project where the Flavor Selection is set to Android (ASTC).
- Once the package is ready you plug in the headset to your PC.
- Open a command prompt in the package directory and type
adb devices.- If
adb devicesdoesn’t show the headset then install the Oculus ADB Drivers and try it again. - If the device is
unauthorizedthen put on the headset go to settings > system > developers > allow checkbox “MTP Notifications”. Reboot headset. Connect USB Cable. Allow USB debug. Source
- If
- Install the application by running the command
adb install <apk-path>oradb install -r <apk-path>if an application with the same name already exists on the device.
The following approaches didn’t work for me:
- Launching your app on a Meta Quest headset.
- Launch a project directly onto your headset from the Unreal Editor.
Setting up a new Unreal project after installation
If you create a new project after setting up the Unreal Engine for Meta Quest development then it is no longer necessary to follow all the above steps. The only steps you need to take are:
- Go to Edit > Plugins > Meta XR plugin and enable the plugin.
- Restart the Unreal Editor.
- Go to Edit > Project Settings > Plugins > Meta XR > Launch Meta XR Project Setup Tool.
- Click on Apply All for the Required Rules. Do this for all devices you want to develop for.
- Go to Edit > Project Settings > Platforms > Android
- Click on Configure Now when you see that your project is not configured for the Android/Google Play services platform.
- Go to Project Settings > Platforms > Android and enable Package game data inside .apk?
Known issues
Oculus OpenXR Runtime
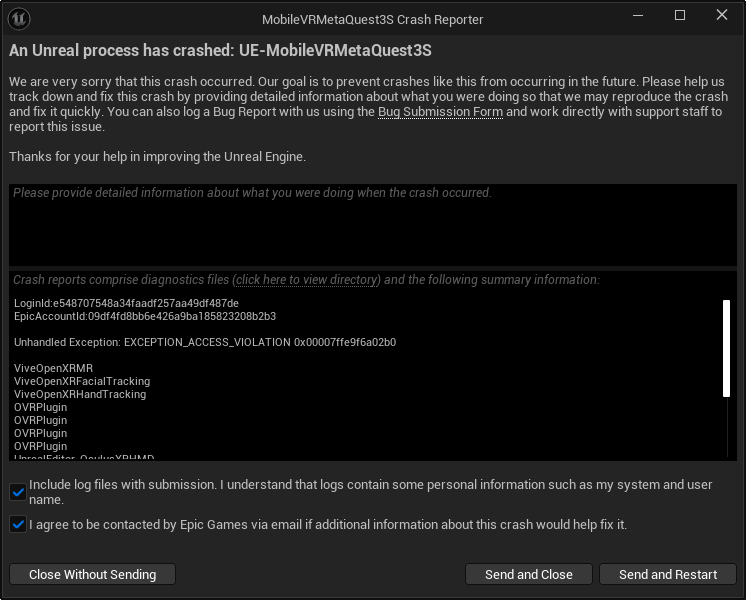
If you read the documentation then you will end up on the Use Link for App Development webpage. Under the Configure feature settings for development section it is stated that you need to select Set Meta Quest Link as active which sets the Meta Quest Link as the active OpenXR runtime. However, if I did this while the Meta XR plugin is enabled the Unreal Editor kept crashing with the following crash report:

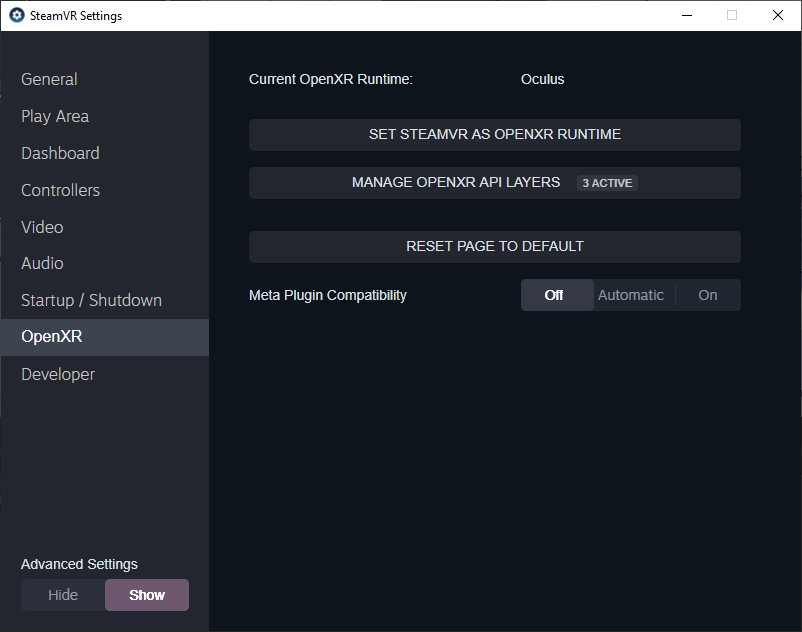
S-ed suggests to use the -nohmd parameter when starting the engine. This worked for me. However, you will not be able to use the VR Preview in the Unreal Editor despite the fact that your headset is connected to your PC through Meta Quest Link or Air Link. Another option that worked for me is to set SteamVR back as the OpenXR runtime in the SteamVR settings. For this SteamVR needs to be installed on your PC.

Meta Quest Link Application
If you’ve used your Meta Quest headset on a different computer before following this tutorial, ensure that Air Link is disabled if the headset and PC are not connected to the same network. In this situation, use a USB-C cable to connect the headset to the PC, and select the Link option in the Meta Quest Link application to detect the headset and complete the setup. If the headset and PC are connected to the same network, you can use the Air Link option in the Meta Quest Link application to detect the headset and finish the setup.